...
Installing 3D Slicer
Browse to http://download.slicer.org/![]() and install the appropriate pre-compiled binary for your system (Windows, Mac, Linux - 32 or 64bit). The stable release is preferred to the nightly build.
and install the appropriate pre-compiled binary for your system (Windows, Mac, Linux - 32 or 64bit). The stable release is preferred to the nightly build.
...
Upon starting Slicer you will be presented with the "Welcome to Slicer" module and the Conventional viewing layout. From here, click the "Load DICOM Data Button".
pic01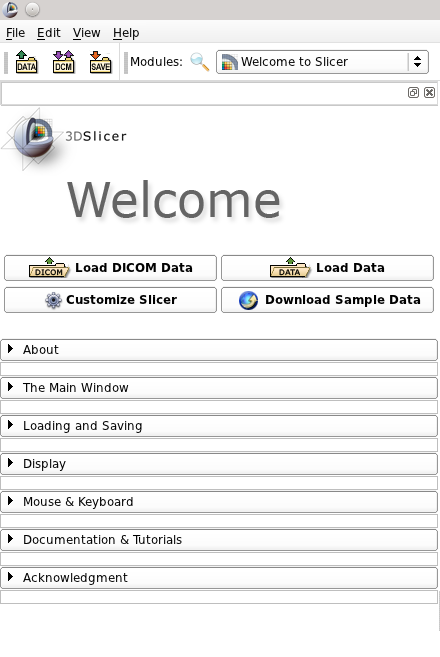
You will be presented with the DICOM Details window. Click the button next to "LocalDatabase" and select a folder for Slicer to use for keeping track of your DICOM data. Then Click the "Import" button.
pic02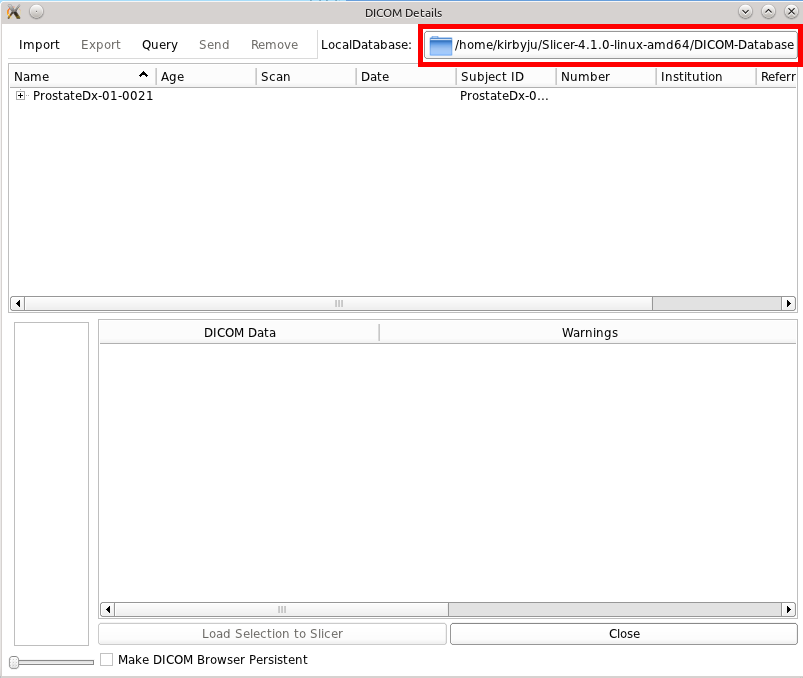
Navigate to wherever you saved the DICOM data from TCIA. Select the "Prostate-Diagnosis" directory and click "Import". You should now see the DICOM data in your "DICOM Details" screen. Drill down into the available data and select the T2W_TSE_AX from the patient you wish to analyze. Then click the "Load Selection to Slicer" button.
pic04
You should now see the DICOM data in the 3 smaller viewing areas.
pic05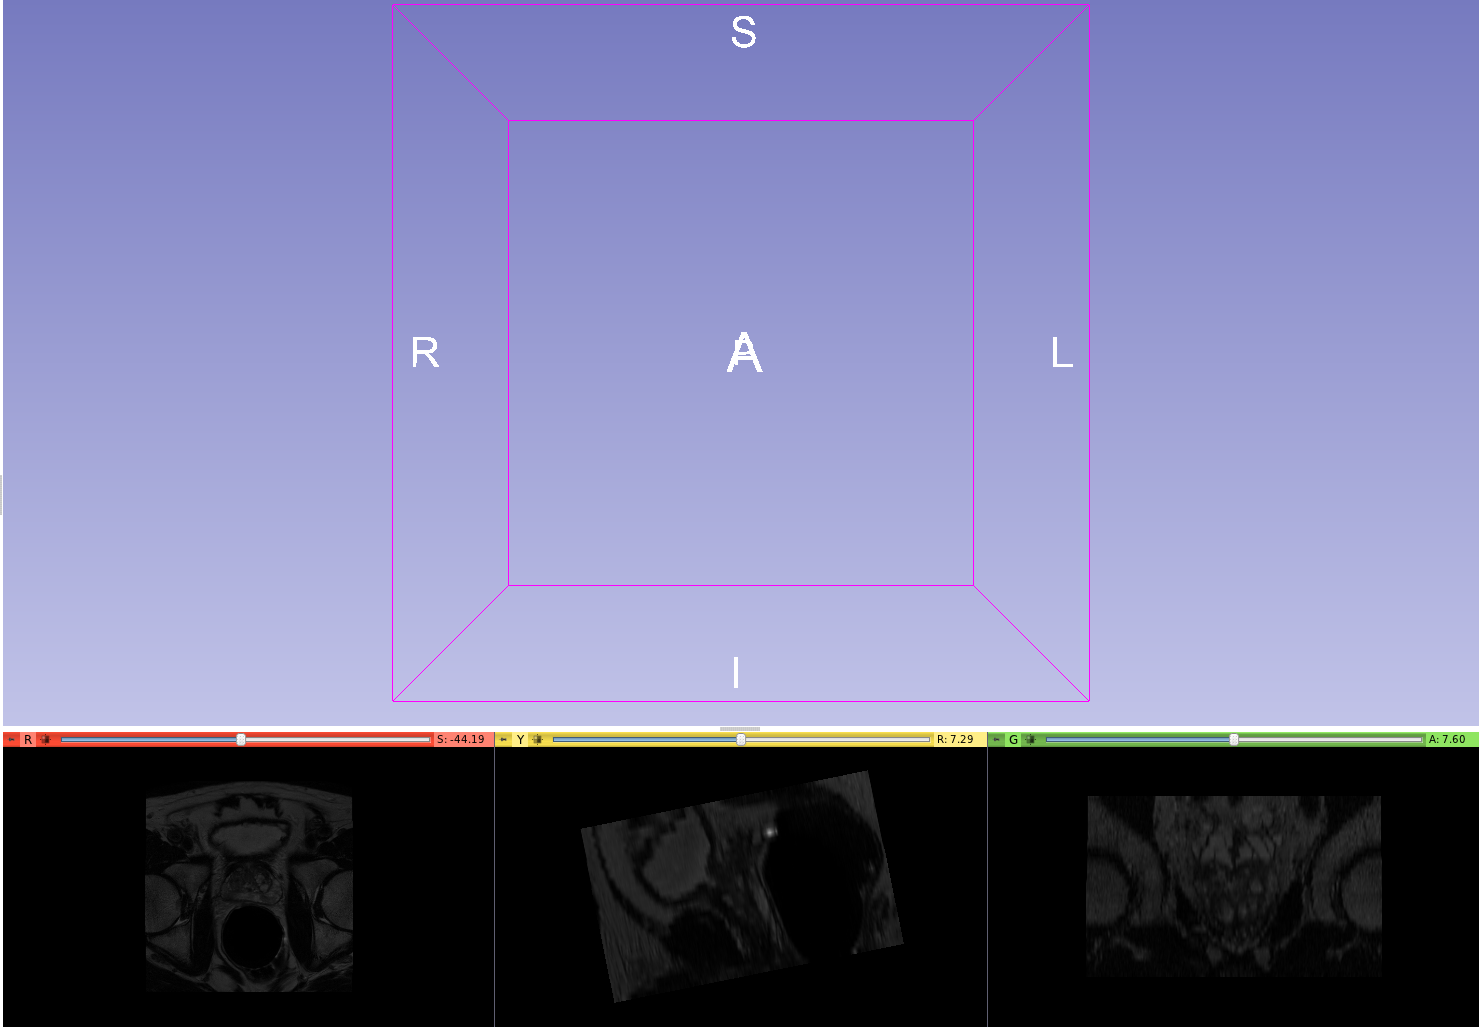
Loading the NRRD segmentation
The next step is to import the NRRD segmentation and generate a 3D model. First you must go to the "File" menu and choose "Add Data".
pic06
Next click "Choose File(s) to Add" and navigate to where you saved the NRRD data. Locate the NRRD file associated with the patient whose DICOM data you loaded in the earlier steps and click "Open". You should now see the NRRD file listed as a volume. Next, click the "Show Options" box in the top right corner of the dialog box and check the "LabelMap" option that appears. Then click "OK".
pic08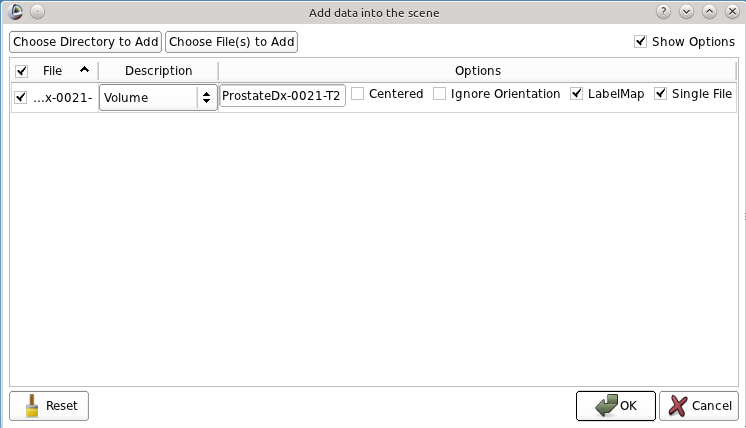
You should now see the colorized label maps appear as an overlay on the 2D DICOM images. Next, click the "Modules" menu and highlight "Surface Modules". Then select "Model Maker".
pic09
The Model Maker module will now appear on the left side of the screen. Under "IO" change the "Models" drop down box to "Create New ModelHierarchy". This will create a new entry called "Models" in this box. Click "Apply" at the bottom of the module and should now see a 3D rendering of the NRRD label map in the main viewing window.
pic10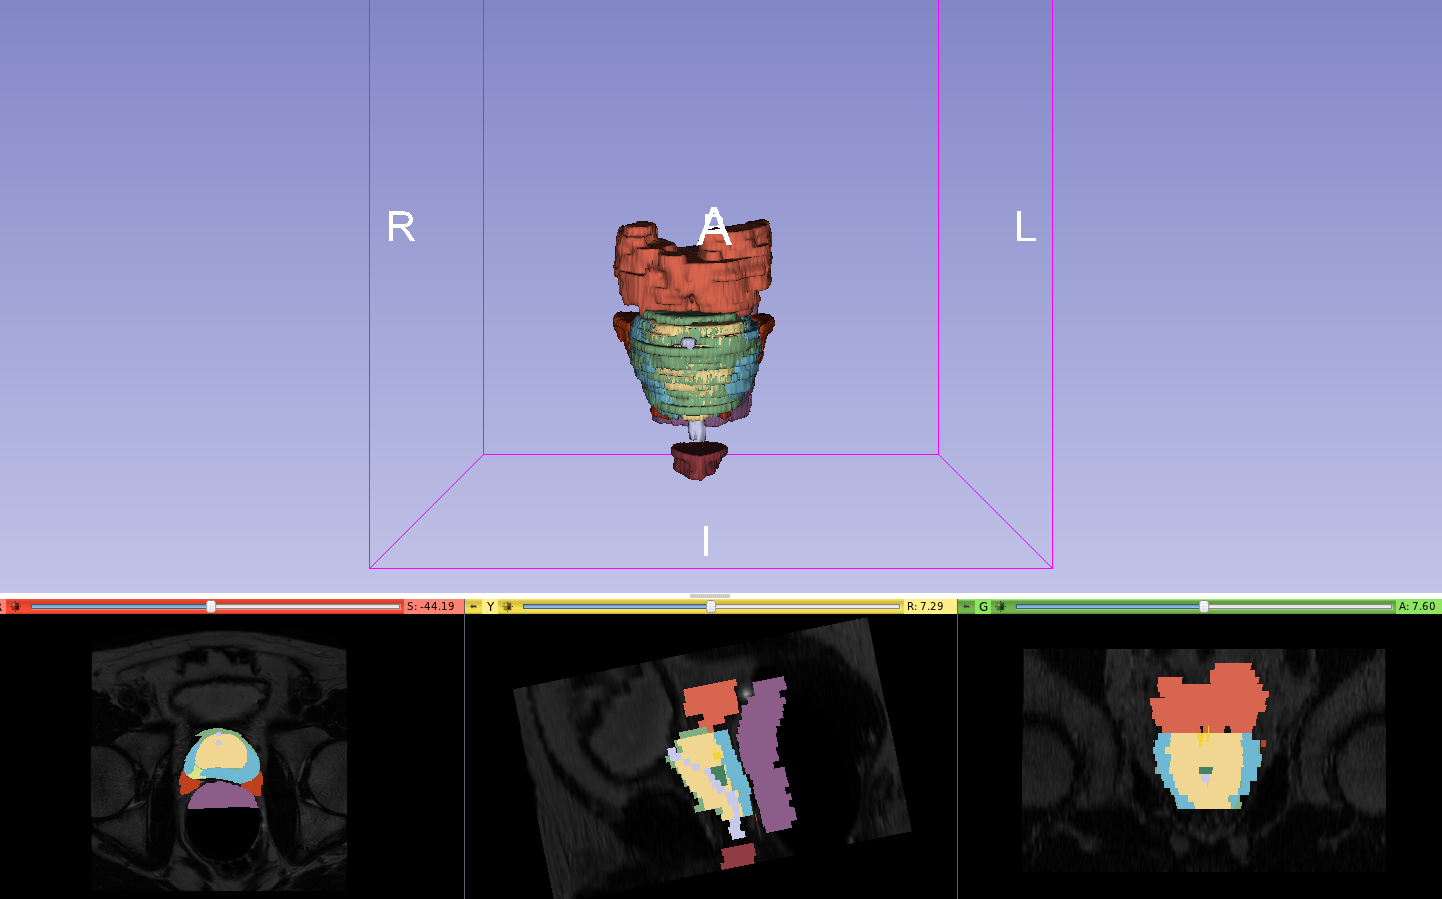
If you prefer you can now tweak some settings to further visualize the data. You can toggle between showing the label map with regions outlined or filled by clicking the small pushpin on each of the 2D views and selecting or deselecting the button next to the label map name. You can also toggle whether the DICOM slices are visible in the 3D view by clicking the visibility button next to the slice orientation.
pic 12 (circle the button for outlines)

You can also