Accessing Limited-Access Collections
You can search and download public data without logging in to the TCIA Radiology Portal. To access restricted data, however, you must log in first to see that data in your search results. Consult the TCIA Collections page to learn which collections have limited access.
- In the top menu bar, click the
 tab.
tab.
The Login window appears.
- Enter your user name and password, then click Log In.
Creating a TCIA Account
To create a new account, do the following.
- In the top menu bar, click the tab.
The Login window appears. - Click
 .
.
The Legal Framework and Ethical Use of This Resource page opens in a browser window. - Read all of the content on the page and then click the CLICKING HERE link at the bottom.

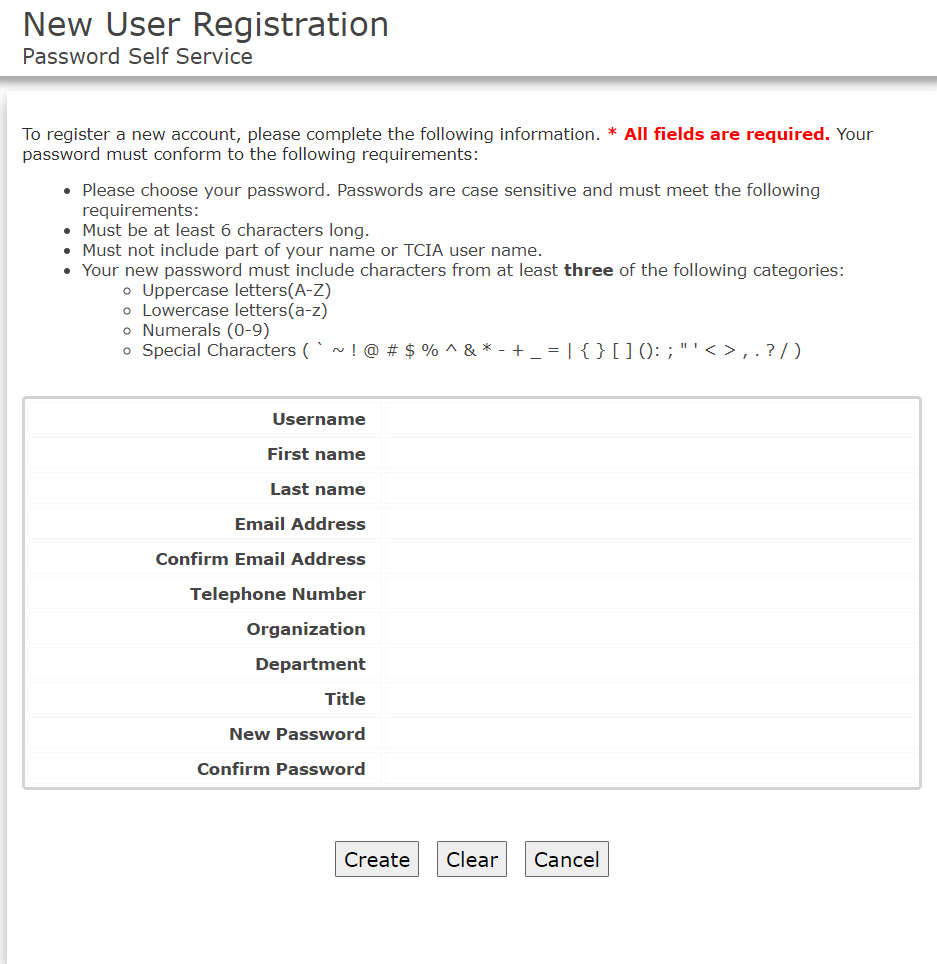
The New User Registration page appears.
Complete the form NOTE: username and email address may contain letters and numbers.
ENTER your email address in both places to your email within your verifiable institution’s / organization’s domain. (e.g., not a free domain server. Contact TCIA support if you need guidance).
SET your Password. NOTE: if your password contains particular characters it may fail to reset. Please avoid & % + in your password.
CONFIRM that the information about your name, telephone, organization, department, and title are complete and true.
ADD your Country.
Then click Create.
Complete the form and click Create.
For username and password help, go to TCIA Account Help.
Sometimes, if you emailed the helpdesk before you create your TCIA account, you won’t be able to create a new TCIA account using that same email on your own. Often the solution is to use the “forgot password” link and then you can proceed.
If that does not work, contact help@cancerimagingarchive.net with the subject line Account Creation - email taken.
Performing a Simple Search
You can search and download public data without logging in to the TCIA Radiology Portal. To access restricted data, however, you must log in first to see that data in your search results.
You can search for image series based on a combination of search filters. Click one or more boxes next to each search filter to select it. As you select search filters, they move to the top of the list. They also appear in Boolean query format above the pie charts. This query specifies the filters you have applied to your search. Click Clear if you want to remove all of your filters at once and start over. You can save your query as a URL for later use or to put in an email to a colleague. For more information about sharing, go to Sharing Data in Your Cart.
- From the Access the Data menu at the top, select TCIA Radiology Portal.
The portal home page appears.
Select filters to narrow down the available image series.
Using Search Filters
General Tab
| To Select | Do This |
|---|---|
Collections | Option 1: Click the box next to the program name to select all of the collections in that program, or click only one dataset in a collection to select it. You can sort the collections alphabetically or numerically (by number of series) by selecting alpha or num at the top. The number of patients in each program or collection appears after the program or collection name.
Hovering over a collection name opens a window with information about the collection in it. Quickly move your mouse to this window, where you can select text and click links. The window stays open until you move your mouse away from it.
|
Option 2: Click the magnifying glass to enter a name. | |
Date Released | Enter a From and To date to narrow your search results to studies that TCIA first made available during that date range. Alternately, select the Apply "Available" date range box to exclude studies that were unavailable to TCIA during the selected date range. Click the
|
Analysis Results | Analysis results are derived data (e.g. segmentations) that were contributed by researchers who were not part of the group that originally submitted a collection to TCIA. To enhance the value of TCIA collections, TCIA encourages the research community to publish their analyses of existing TCIA image collections. Examples of this kind of data includes radiologist or pathologist annotations, image classifications, segmentations, radiomics features, or derived/reprocessed images. Click the box next to each analysis results option you want to select. Only DICOM data from analysis results appear when using this search filter. A full listing of all analysis data inclusive of non-DICOM formats appears in the TCIA Analysis Results.
|
Exclude collections with commercial use restrictions | TCIA supports collections with different types of licenses. Some licenses prohibit the commercial use of the collection. You can filter your search results to exclude those collections that have commercial use restrictions.
|
| Identifiers | To filter by identifier(s), select an identifier type, enter them into the box as a comma-separated list, and then click
|


Patients Tab
| To Select | Do This |
|---|---|
Patient Sex | Select the patient sex by which you want to filter your search results.
|
Patient Age | Some datasets encode Patient Age information in the image metadata. This filter allows you to refine search results based on the range of selected patient age range when these metadata are included by the data submitter (e.g. "patient age range"). The max inclusive age is 89 years old. The selection of 90 years old is considered as "90 and older." |
Clinical Time Points | Some datasets encode Clinical Time Point information in the image metadata. This filter allows you to refine search results based on how many days have passed since a particular clinical event occurred when these metadata are included by the data submitter (e.g. "Days since diagnosis"). Clinical Time Points provide temporal context information aligned with events in the clinical data set for each patient. TCIA has inserted information in the DICOM tag (0012,0050) Clinical Trial Time Point ID. This DICOM tag contains the number of days from the date the patient was initially diagnosed pathologically with the disease to the date of the scan. For example, a scan acquired 3 days before the diagnosis would contain the value -3. A follow up scan acquired 90 days after diagnosis would contain the value 90. Click select to view the types that are available in the database, plus their available date range. In the from and to boxes, enter numbers that correspond to the range of days from and to that time point.
|
Number of DICOM Studies | A "DICOM Study" is a set of related series that occurred on a given date. This filter allows you to refine Search results to only include Patients with more than a specified number of DICOM studies. The most common use case for this filter is to identify patients who were imaged at more than one time point (at least as many as you've selected). Use the Study Date option for this purpose. This filter allows you to refine Search results to show only studies with a minimum selected number of study UIDs or Dates (time points) that occur on the same date.
|
Species | Click the box next to the species you want your search results to represent, either human, Mus musculus (mouse), or Canis lupus familiaris (dog). The number of studies
|
Phantoms | Click the box next to the phantom option you want to select.
|


Images Tab
| To Select | Do This |
|---|---|
Image Description | This filter allows you to refine search results to those matching the Series Description, Study Description, and Protocol Name fields. Results include datasets that have one or more of the search terms separated by spaces. The search is case-insensitive. Wildcards can be used for partial word matching. Use double quotes to ensure that a multiple word phrase is included. Enter words and then click
|
Image Modality | Click the box next to one or more image modalities. If you select more than one image modality, clicking ANY returns any series that have ANY of the modalities you selected. Clicking ALL returns series from subjects that have ALL the modalities you selected. The numbers following each modality represent the number of studies returned by your search and the total studies available. The image modalities you select don’t have to be in the same timepoint/study to appear in the search results. The returned studies may only be a subset of those associated with a single subject.
|
Body Part Examined | Click the box next to each anatomical site you want to select. Click alpha or num to sort the list alphabetically or numerically. Select Not Specified to find data for which the BodyPartExamined field is empty.
|
Manufacturer | The manufacturer of the device used to collect the image.
|
Slice Thickness (millimeter) | Some datasets encode Slice Thickness information in the image metadata. This filter allows you to refine search results based on the range of selected slice thickness when these metadata are included by the data submitter (e.g. "slice thickness"). Set the number slider to the range of slice thickness in millimeters you want to see in studies returned by your search, then click
|
Pixel Spacing (millimeter) - row | Some datasets encode Pixel Spacing information in the image metadata. This filter allows you to refine search results based on the range of selected pixel row spacing when these metadata are included by the data submitter (e.g. "Pixel Spacing"). Set the number slider to the range of pixel spacing in millimeters you want to see in studies returned by your search, then click
|


Viewing Subject Details

Click Result Charts to open a view of your search results in chart form and the search filters you selected at the top. These charts show counts of collections, image modalities, and body part examined in the database. Each pie "slice" is a filter you can use to narrow the data in the portal. Hover over a pie chart slice to view the name of each filter. The size of each pie slice is relative to the size of that filter's representation in the database.

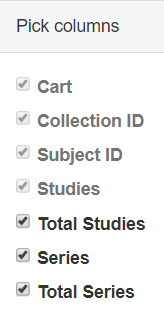
Select which columns you want to have appear in the table by clicking![]() at the top of the table. The Pick columns panel appears.
at the top of the table. The Pick columns panel appears.
The search results that match your criteria appear sorted by Patient ID. Click a Patient ID link to drill down into the subject details.

In this example, this patient (also called subject) is associated with four studies.
You can add all studies associated with a subject to your cart at the same time or drill down to an individual study and add it to your cart instead.
The red asterisk indicates that the date, which is the date that this series was first available at TCIA, has been offset to protect private health information.
Click the date or the arrow to the left of the study cart icon to view details about that study.
All of the image series associated with that study appear.

You can now:
- View the series description, modality, manufacturer, number of images, and series ID.
- Download study data.
- View thumbnails of the image series.
- View an animation of the image series.
- View DICOM data for this image series.
Downloading Study Data
You can download items you add during the current work session. Before you download items you must download and then install the NBIA Data Retriever.
You select items to download by first searching for them in TCIA and then adding them to your cart.
You can also export data in your cart to a spreadsheet.
Visualizing Data in the Cart
Viewing TCIA Collections
You can visualize TCIA collections in your cart before you download them by launching an image animation when there are more than two images in the series.
- Click the Cart tab.
- In the row for an image series, click
 .
.
The images in the series open in the Open Health Imaging Foundation (OHIF) Viewer.
- Click
 to display the images in the series sequentially.
Viewing Thumbnails of the Image Series
In your cart, You can visualize thumbnails of all images in the selected series and then open selected images for further analysis in another image system.
- Click the Cart tab.
- In the row for an image series, click
 .
.
Thumbnails of all of the images in the selected image series appear.
- Click any image to download it to your computer.
Follow your browser's instructions to open or save the file.
Viewing DICOM Headers
DICOM tags form the header of an image series.
- Click the Cart tab.
- In the row for an image series, click
 .
.
The DICOM tags associated with the image series appear.
Adding Data to the Cart
After adding data to the cart, you can visualize it in different ways before downloading it.
To add all subjects to the cart
- Search for the subject.
- Click the Search Results tab.
Click the subject cart icon in the row of one or more subjects. This selects all studies associated with each subject.
The cart icon turns green and the number of image series now in your cart appears next to the cart. The cart itself, in the upper-right of the window, shows how large the download will be.To remove all of the data associated with this subject from the cart, click the cart icon again.

To add selected studies to the cart
- Search for the subject.
- Click the Search Results tab.
- Click a Subject ID link or click the arrow to the left of the subject cart to open all series associated with that subject.
- Click the cart icon for one or more series.
- The study cart icons you select turn green.
- The subject cart icon for the subject turns yellow, indicating that you have not selected all available studies for this subject.

To add selected series to the cart
- Search for the subject.
- Click the Search Results tab.
- Click a Subject ID link or click the arrow to the left of the subject cart to open all series associated with that subject.
- Click a study date link or click the arrow to the left of the study cart to open all the series associated with that study.
- Click the cart icon for one or more series.
- The series cart icons you select turn green.
- The study cart icon for the subject turns yellow, indicating that you have not selected all available series for this study.
- The subject cart icon for the subject turns yellow, indicating that you have not selected all available studies and series for this subject.

Downloading the NBIA Data Retriever
The most convenient method of downloading them is by using the NBIA Data Retriever. You must install the NBIA Data Retriever before you begin downloading. You only have to install it once to use it in future downloading sessions.
If you are using Linux, you can access NBIA Data Retriever's command-line interface, which does not require the desktop environment.
Consult the NBIA Data Retriever FAQ for more information about NBIA Data Retriever versions and usage.
Linux Installation Instructions
RPM (tested on Fedora 40 Workstation, OEL 9.4)
To run this file, type the following at the command prompt (only run the first command if you need to uninstall a previous version).
sudo yum -v -y remove NBIADataRetriever-4.4.2.x86_64.rpm
sudo yum -y install NBIADataRetriever-4.4.3-1.x86_64.rpm
DEB (tested on Ubuntu 2024 LTS)
To run this file, type the following at the command prompt (only run the first command if you need to uninstall a previous version).
sudo -S dpkg -r nbia-data-retriever-4.4.2.deb
sudo -S dpkg -i nbia-data-retriever-4.4.3-1.deb
Installing the NBIA Data Retriever
To install the NBIA Data Retriever on Windows
- Download the installer package for Windows using the Windows link in the panel above.
- Save the installer package file to your computer.
- Install the app by double-clicking the installer package file.
- Agree to the terms in the License Agreement and click Install.
- When the Setup Wizard ends, click Finish.
To install the NBIA Data Retriever on Mac
The Mac version of the NBIA Data Retriever is only available through the iOS App Store. It requires a manifest file to work. You can download the app first or create a manifest file first. If you download the app first, right-click the manifest file and select Open With Downloader App. If you create a manifest file first, right-click it and select Open With App Store. This installs the app and then opens the manifest file in the app.
On your Mac, find the NBIA Data Retriever on the Mac App Store.
The NBIA Data Retriever is a free app but still requires you to log in to download it. Consider changing your iOS Password Settings so that you can download free software without having to log in separately for it.
- Click Get, then click Install App. The NBIA Data Retriever is free.
The app starts downloading to your Mac. When the download is complete, you can open a manifest file with the NBIA Data Retriever.
To install the NBIA Data Retriever on Linux (centOS or Ubuntu)
To install the NBIA Data Retriever for all users, you must have the sudo privilege on your computer and a sudo password to install the NBIA Data Retriever on CentOS and Ubuntu.
If you do not use sudo, you can install the app locally by extracting the .deb or .rpm file to a directory where you have execute permissions and then running the app with a manifest file.
- Download the installer package for centOS or Ubuntu using the RPM and DEB links in the panel above.
- Save the installer package file to your computer.
- Open a command window and go to the location where you saved the installer.
Downloading Images Using the NBIA Data Retriever
- Add data to the cart and then download a manifest file of all of the data in your cart.
- Add data to the cart and then download a manifest file of only selected subjects and/or series.
- Download all of the data in the current query immediately. When you download the query, the results are the same as downloading your full cart.
TCIA provides your download in the form of a manifest file (manifest-xxx.tcia). You must install the NBIA Data Retriever to open this manifest file and download the data. You can access the latest version of the NBIA Data Retriever by selecting Download > Get NBIA Data Retriever.
You can share the manifest file with collaborators so that they can download the same images that you have selected by sharing your cart or sharing your query. Collaborators must also have the NBIA Data Retriever to open the manifest file you share.
If you want to share a manifest file that includes links to private image collections, you must first manually install the latest NBIA Data Retriever. The NBIA Data Retriever controls access to private collections. Your collaborators must have the same access to the private collections in the manifest as you do. Otherwise, your collaborators will not be able to download images from those collections.
Downloading the Cart
You can download a manifest file of the full cart or a partial cart representing your selected subjects and/or series. You may want to do this, for example, if you are building a complex dataset by selectively adding scans to your cart from one or more queries.
Once you download the manifest file, you would then open it in the NBIA Data Retriever to download the data to your computer.
- Search for images of interest.
- Add those images to your cart. You can add all images or select subjects and/or series of interest.
- Click the cart icon in the top-right of the page
 .
.
The cart contents appear.
To download the full cart without selecting specific series, select Download > Download Cart.

or
To download only your selected subjects and series, click .
.Another option is to export the cart as a spreadsheet.
A manifest file including all of the contents of your cart downloads to your browser. Proceed to opening the manifest file and downloading the data.
Downloading the Query
After you have constructed a query by selecting options in the TCIA Radiologic Data Portal, you do not have to go to the cart at all to download it. You can download your query's results immediately. Just as with the cart, the data downloads in the form of a manifest file that you can open with the NBIA Data Retriever. This option is useful and efficient for downloading a lot of data.
To download your query, do the following.
- Search for images of interest.
- Select Download > Download Query.

A manifest file including all of the contents of your cart downloads to your browser. Proceed to opening the manifest file and downloading the data.
Opening the Manifest File and Downloading the Data
Once you have a manifest file, you need to download and install the NBIA Data Retriever, which is available for Windows, Mac, and Linux. You can get this app by selecting Download > Get NBIA Data Retriever.
Opening the
manifest-xxx.tciafile will launch the NBIA Data Retriever. If you're working in a Linux environment, you can also launch the NBIA Data Retriever from the command line.
The Data Usage Policy notification appears.
Click Agree. You must agree to the data usage policy before you can proceed with downloading the data in your cart. Note that this policy is included in the license file accompanying your download.
If you have added limited-access series to your cart, the NBIA Data Retriever login window appears. Enter your user name and password and click Submit.

If all of the series you have added to your cart are public, the NBIA Data Retriever appears, showing the items you added to your cart in the Downloads table.

Notes:
- To verify the integrity of the download, select File > Checksum Verification prior to clicking Start. This calculates the checksum value of files you are downloading, comparing it with the same data in the database. If a mismatch is detected, an error message will appear, and you can also click the three dots in the Status column for more information. If you do not select Checksum Verification, the NBIA Data Retriever will still verify the download by comparing the file size of the series you are downloading against the database.
If there are series in your download that have commercial use restrictions, the NBIA Data Retriever displays a message referring you to the license information for these series.
You can hover your mouse over the Patient ID, Study Instance, and Series Instance columns to reveal the complete corresponding IDs. You can also resize a column by selecting and dragging the column border.
- If you do not want to download any of those items, select them in the Downloads table and then click Delete. When you remove an item from the Downloads table, it stays in your cart in the Radiology Portal.
If you close the NBIA Data Retriever in the middle of a download, NBIA Data Retriever remembers the partial download. When you restart the NBIA Data Retriever, choosing the same download directory as before, and click Start, you are prompted to specify whether you want to download just the missing series or download all of the series in the original manifest file.

If you choose Download all, the existing download folder will be overwritten with all of the series in the original manifest file. If you choose Download missing series, only those series you have not previously downloaded appear in the Downloads table in the NBIA Data Retriever window, then download only those series.
NBIA Data Retriever File Naming System
The file naming system used by the NBIA Data Retriever provides a natural ordering of the files within each series. The DICOM files are first ordered by ordinal position of acquisition number and then by ordinal position of instance number. The files are then assigned numbers with the lowest acquisition being 1 and the lowest instance number within that acquisition being 1, separated by a dash. The numbers are incremented by 1 as the next values are encountered. All values are left-padded with zeros to provide for the ordering within the file system.
As an example, a series with two acquisition numbers, with each acquisition having 42 instance numbers, would start with 1-01.dcm for the lowest acquisition number and the lowest instance number in that acquisition. The last file in that acquisition would be 1-42.dcm. Then the second acquisition would start with 2-01.dcm and end with 2-42.dcm. For the purposes of ordering, an empty value in either acquisition number or instance number is lower than an file having a value for those numbers.
- Select how to organize the downloaded files.
- The Descriptive Directory Name organizes the files in a child folder under the destination folder as follows: Collection Name > Patient ID > Study Date + Study ID + Study Description (54 char max) + last 5 digits of Study Instance UID > Series Number + Series Description (54 char max) + last 5 digits of Series Instance UID
- The Classic Directory Name organizes the files in a child folder under the destination folder as follows: Collection Name > Patient ID > Study Instance UID > Series Instance UID
- Click Browse to navigate to the destination folder.
- Click Start to begin the download. You can monitor the status of the full download in the progress bar on top, and for each collection in the Progress column. The Status column indicates when the download for each item is complete.
At any point in the process, you can click the Pause and Resume buttons to temporarily stop and restart the process.
Network Error?
If network errors occur during large downloads, the NBIA Data Retriever retries downloading the series in the manifest file the number of times that your administrator has configured. The default is four times.
After the automatic retries, you have the option of retrying just the failed series, saving an error report, which you can share with the TCIA help desk, and exiting.

Exporting the Cart to a Spreadsheet
To export your cart
- Add data to your cart.
- Click
 .
.
The cart appears.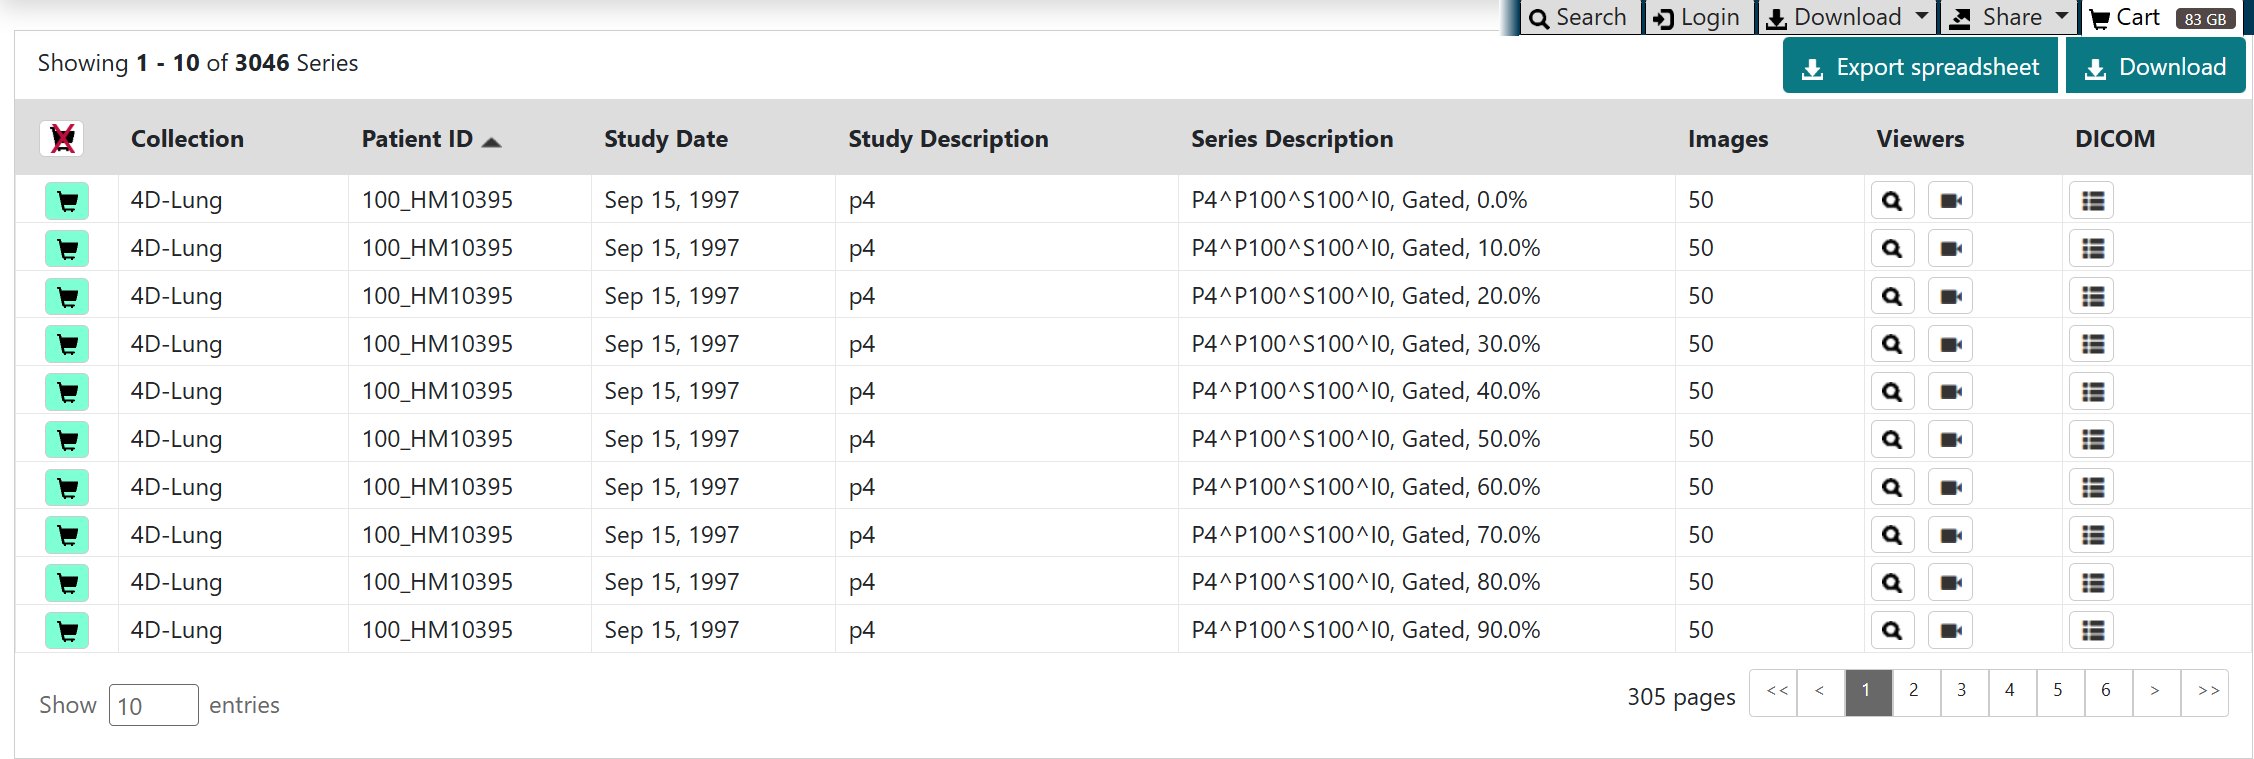
- Click
 .
.
A CSV file called "metadata" opens in your browser. This file provides an overview of the downloaded files.
Metadata file in the manifest folder
Metadata file opened in Microsoft Excel
This file includes the following columns:- Patient ID
- Patient Name
- Patient Birth Date
- Patient Sex
- Ethnic Group
- Phantom
- Species Code
- Species Description
- Study Instance UID
- Study Date
- Study Description
- Admitting Diagnosis Description
- Study ID
- Patient Age
- Longitudinal Temporal Event Type
- Longitudinal Temporal Offset From Event
- Series Instance UID
- Project
- Modality
- Protocol Name
- Series Date
- Series Description
- Body Part Examined
- Series Number
- Annotations Flag
- Manufacturer
- Manufacturer Model Name
- Pixel Spacing(mm)- Row
- Slice Thickness(mm)
- Software Versions
- Image Count
- Max Submission Timestamp
- License Name
- License URI
- Collection URI
- File Size
- Date Released
- Third Party Analysis
Sharing a Query
You can save your query for later use or share it with a colleague by email.
To share a query
- In the top menu bar, click
 and then select Share my query.
The Query URL box appears.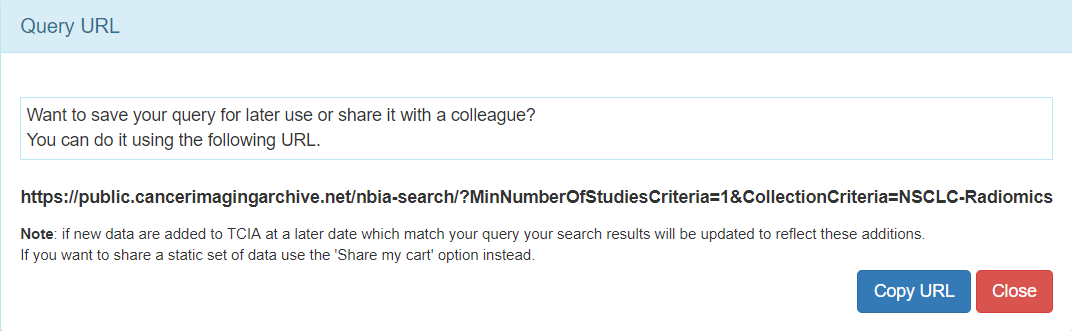
- Click Copy URL.
The URL copies into your Clipboard. Paste the URL into an email or other document.
Shared queries honor data permissions that may exist. Each person that runs the shared query will only see search results that he or she is allowed to see.
Sharing Data in Your Cart
Once you have added data to your cart, you can share it as a URL to a static set of data. When you or a colleague opens the URL in a browser window, the new TCIA Graphical User Interface (GUI) opens to the cart page.
In the legacy TCIA data portal, this was called a shared list. This is a similar concept in the new TCIA GUI.
To share data in your cart
- Add data to your cart.
- In the top menu bar, click and then select Share My Cart.
The Retrieve Cart Data URL box appears.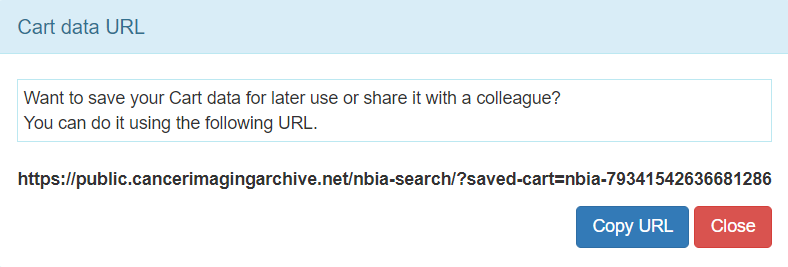
- Click Copy URL.
The URL copies in your Clipboard. - Paste the URL into an email or other document.
The shared cart honors data permissions that may exist. Each person that opens the shared cart will only see data that that person is allowed to see.
You can print and export wiki pages.